How to Grow Alliums
20 February 2025

How to Grow Alliums

The Allium group of plants include about 800 species. There are only a few that are known as edible crops and these have been grown for centuries to add flavour and goodness to food. The main Alliums that we are familiar with are onions, garlic, leeks, and spring onions and chives.

When to Plant
Most Alliums are best planted around the shortest day and harvested around the longest day. Although this is a good guide, the season is greatly extended when planted progressively from Equinox to Equinox - March 22nd to September 21st.

Onions
The main onions grown in the home garden are the red, white and brown onions.
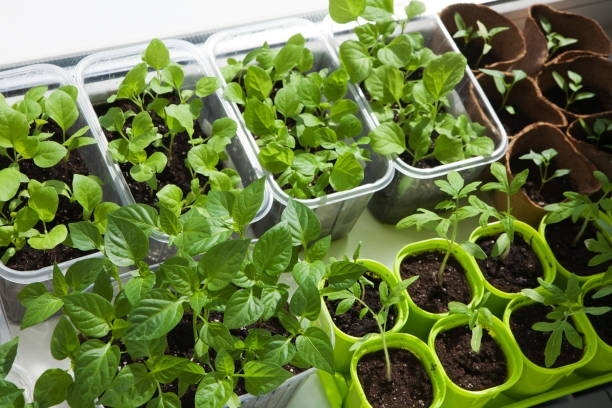
Onion seed can be sown in beds or seed trays and transplanted when the seedlings are 10cm or so high. They should be planted 10-15cm apart in rows 20 to 30cm apart. Buying onions as seedlings in punnets is a convenient way to begin your onion growing. Wash the soil from the punnet & separate the seedlings before laying the seedlings on the ground and just cover the roots with soil. They will right themselves to be upright within a few days.
The onions will be ready to harvest in six to eight months. They are ready when the tops die off and the leaves dry and fall over. After they are pulled out they should be left in the sun for a few days. When the skin is quite dry the top is screwed off and the roots rubbed off. They can then be stored in wire baskets or mesh bags in a cool dry place.

Leeks
Leeks are easy to grow. Leeks can be planted from seedlings or sown in a seed tray and planted out after about 6 weeks. They have the mildest and sweetest flavour of the onion family, and there are lots of ways you can enjoy them in cooking.
Begin to harvest in 15 -18 weeks once they are large enough to use. Leeks can be left in the ground for a long period so do not need to be all harvested at once.

Garlic
Garlic is grown for its pungent bulb. It is easy to grow and is popular in kitchen creations.
Garlic cloves are available to be planted during autumn and winter for harvesting in late spring-summer. Plant in a nice sunny position with well-draining soil.Lime the soil well and add a little phosphorus to aid in bulb production.Garlic plants are not ready to harvest for 7-8 months so choose a spot that will not interfere with the planting of other crops.

Planting Garlic Cloves 
1- Separate the cloves and plant the largest ones into moist soil, 15 cm apart. Push them in, pointy end up, until they sit just below ground level.
2- Apply a slow-release, high phosphorus fertiliser at planting and again three months later. In spring, apply a low nitrogen-based, balanced fertiliser to fatten out the bulbs.
3- Don’t water the soil until the cloves have germinated, which should be about two weeks after planting. Water often enough to keep the soil moist but not cold and sodden.
4- Mulching helps to control weeds and to keep the soil moist. Apply about 3cm of mulch such as straw or sugarcane mulch.

Garlic plants are ready to harvest once the leaves change from green to brown and the flower stems begin to soften. Mostly the garlic bulbs are close to the surface and easily pulled out by the leaves. A garden fork may be needed to loosen the bulbs if they are a little deeper. Hang harvested garlic in a dry position with good air flow to allow bulbs to ‘harden’ and leaves to dry. Garlic can be stored in a dark, dry place for about 6 months.

Spring Onions
Unlike the normal globe onions, Spring Onions are grown for their slender white stems and leaves. They still have small edible bulb and the entire plant is filled with flavour and goodness. Spring Onions can be grown all year but they do enjoy the cooler months.

Spring Onions are easy to grow in the home garden. They do not need lots of space and are suitable to grow in pots and containers. They can be grown from seeds or purchased as seedlings or in small pots ready to plant. Spring Onions can be planted nice and close at 5mm apart. Harvest begins in 8 to 12 weeks. Spring Onions are not dried before use. Harvest, remove dry leaves to expose the white stems, remove roots, wash and use.

Chives
Chives are a great herb to grow in the home garden. There are so many great uses for the easy to harvest and tasty stems that give a fresh dash of green colour and mild onion flavour to salads, dishes and soups.
The two species of chives commonly grown in home gardens are common chives and garlic chives.
Common chives consist of clumps of small, slender bulbs that produce thin, tubular, blue-green leaves reaching 25cm – 35cm in height. The flowers are also edible and may be white, pink, purple, or red, depending on the variety.

Garlic chives look similar to common chives, but leaves are flatter, greener, and they grow to about 50cm in height. As their name suggests, their leaves have a mild garlic flavour. Flowers are white and are larger and less densely clustered than those of common chives. Garlic chives are not quite as cold hardy as common chives.

When planting Chives, plant in a clump with seedlings about 10cm – 15cm apart. Chives are easy to grow and are drought tolerant but consistent watering through the drier months will ensure lots of fresh and tasty stems to harvest. Chives are shallow growing plants and regular mulching will conserve water and help to control weeds. Use a good, organic, high nitrogen fertiliser in late spring to maintain good production for summer feasting. Divide chive clumps every few years to give plenty of room for fresh, new growth

Although most Alliums are in the garden for long periods of time, they not only supply a reliable source of tasty and goodness filled food for the household, but they look fantastic as they do this.

A close up of red and green peppers growing on a plant.
20 February 2025
Spice up your life!
A close up of a cabbage with green leaves growing in a garden.
20 February 2025
Cabbages are a fantastic winter crop and are perfect for adding to soups, stews, and salads. Cabbages are planted from seeds or seedlings as the cooler season begins. Choosing the Right Variety Some of the most popular cabbage varieties grown include White (Cannonball), Savoy, Red cabbage and Chinese cabbage. White (Cannonball) cabbage is a compact variety that is easy to grow and produces large heads. Savoy cabbage has crinkled leaves and a mild flavour, making it a great choice for salads. Red cabbage is a colourful variety that adds a splash of colour to any dish. Chinese cabbage include Bok Choy and Pac Choy and are popular in Asian cooking. Preparing the Soil Before planting your cabbage seedlings, you will need to prepare the soil. Cabbages require well-drained soil that is rich in organic matter. Start by digging over the soil and removing any weeds or debris. Next, add compost or well-rotted manure to the soil to improve its fertility. You can also add some blood and bone to provide essential nutrients for your plants. Planting Your Seedlings Once you have prepared your soil, it’s time to plant your cabbage seedlings. Space your seedlings around 30cm apart to allow them enough room to grow. After planting, water your seedlings thoroughly to help them establish their roots. Using a plant tonic such as Seasol will minimise transplant shock and help your plants to have the very best start. Caring for Your Cabbages To ensure that your cabbages grow healthy and strong, there are a few things you will need to do. Firstly, you will need to water your cabbages regularly. Although cabbages are grown through winter, the soil needs to remain moist so be sure you give them a good soaking during dry periods. You will also need to protect your cabbages from pests and diseases. Common cabbage pests include cabbage white butterflies, aphids, and caterpillars. To prevent these pests from damaging your plants, you can cover them with a fine mesh netting. You can also use organic pest control methods such as neem oil or pyrethrum spray.
There are many different types of flowers in this field.
20 February 2025
So often we hear that the garden is dull and colourless in the summer after all the pomp and splendour of the spring season, but this needn’t be the case. Right now we have a fantastic range of summer perennials in stock that will perform and improve year on year in the summer and autumn garden, giving a real wow and an essential pop of colour at a time of year when it can be great to enjoy the garden at any time of day or alfresco in the evening. Try out some Agastache or more commonly known as Hummingbird Mint, such as Agastache ‘Sweet Lili’ a magnificent Australian hybrid with apricot tinted rich amethyst flowers or Agastache ‘Blue Boa’ with densely packed spires of rich blue. Cone flowers are an essential part of the perennial garden at this time of year and include the statuesque Rudbeckia laciniata with towering stems to 2m with bright golden petals around a central cone of black. We have a great range of Echinacea also referred to as cone flower such as the newly released Echinacea ‘Rich Red’ with flowers that open as a vibrant orange red and deepen with age until they are a rich glowing deep red, or you could try one of the bright pink cultivars such as Echinacea ‘Magnus Superior’ with huge blooms with broad petals or the quirky Echinacea ‘Double Decker’ that produces a second row of petals from the top of the cone. Globe thistles such as Echinops ritro ‘Taplow Blue’ are much adored by bees and humans alike and they produce an abundant display of golf ball sized sapphire blue blooms that also make a fabulous cut flower for the home. For those who may live by the seaside or further inland we have the super hardy Sea Holly Eryngium bourgatii ‘Oxford Blue’ with its architecturally gorgeous blooms of steely blue. We also have the far less commonly seen Pink Statice, Limonium peregrinum which will endure hot dry conditions and harsh winter frosts to boot and still flower with papery pink blooms which can be picked and dried and will maintain their colour for years after picking. An essential of the modern New Age Perennial Movement that is sweeping the world are the perennial grasses and we have some great stock now, such as Panicum ‘Iron Maiden’ a new release Aussie Bred form with densely clumping glaucous blue grey foliage with deep purple highlights topped with fawn inflorescences which look wonderful when back lit by the afternoon sunlight. Japanese Sword Grass is another must have, try Miscanthus sinensis ‘Kleine Fontane’ (little fountain) with green foliage with a strong central silver spine and superbly fluffy flower plumes of silver grey or Miscanthus sinensis ‘Gold Bar’ who’s rich green foliage is regularly crossed with band of gold on an upright tight clumping form. What summer garden would be complete without Queen of the Meadow or Filapendula palmata nana with its fairy floss pink flower heads on thin elegant stems or the delightful spires of Veronicastrum or Culver’s Root. These form lovely clumps topped with long elegant flower spikes. Try Veronicastrum virginicum ‘Lavendelturm’ with soft mauve flowers, or the Icy Blue of Veronicastrum sibiricum. Now is a great time to see and plant these and many other beauties from our nursery to your garden, and add a little extra sizzle to the summer garden.
A group of potted plants are sitting on a window sill.
20 February 2025
Easy and Rewarding Herb Gardens
A bush with red flowers and green leaves
20 February 2025
Learn How to Grow Callistemons with Stoneman's
A bunch of potted plants are growing on a window sill.
20 February 2025
Growing Food in Containers 
A bunch of pink roses are growing on a bush.
20 February 2025
A simple guide to pruning Bush Roses at home
A bunch of peaches hanging from a tree branch.
20 February 2025
Winter is a great time to prune some of your deciduous fruit trees, berries, fruiting bushes and productive vines. Sharp and clean tools are essential for causing minimal damage to your fruiting plants. Before you begin any pruning wipe down cutting implement blades with Metholated Spirits or a 10% solution of Bleach. Repeat this process of cleaning your blades in between pruning each tree to ensure no transfer of any virus that may be present. Stone fruit, ie; Cherries, Apricots, Peaches, Nectarines and Kiwi Fruit should not be pruned in winter as they are prone to many water borne diseases that enter via open cuts when sap flow is low. These trees should be pruned immediately after fruiting in summer when sap flow is high and wounds heal quickly. Now is the time to prune and shape your Apple, Pear, Quince and Nut trees. The vase shape method of pruning is suitable for all fruit trees - the final shape should resemble a wide angled, open centred goblet (see below). The aim is to select three or four branches at least 50cm above the ground and each pointing in a different direction. These will become the main leaders of the future tree and will be subdivided again in later years to form sub leaders. Choose the best side branches and cut the main stem back to above the level of the highest side branch selected. Prune the outside shoots to an outside bud all at about the same level. If your tree is young and doesn’t have enough side branches, cut the main stem back to approximately 1m and select suitable branches the next year. This is a better option than using inferior branches. During the early years of the tree’s life, it is important to develop a framework that is sufficiently strong and capable of bearing the weight of crops borne. Be sure to remove any decaying fruit, leaves and your pruned branches as these harbor overwintering pests and disease. PEST CONTROL Winter is an important time to clean up fruit trees to prevent problems during the season ahead. Lime Sulphur sprayed liberally on all deciduous fruit trees is fantastic for the control of over-wintering pest and diseases. Copper Spray is best applied in late winter/early spring just as your trees begin to awaken from their slumber. Copper Spray will prevent stone fruit diseases such as Leaf Curl, Shot Hole and Mildew on newly emerging foliage. Timing of applying Copper Spray is important and the 1st spray should be applied as the buds begin to swell. The 2nd spray will need to applied when 80% of your flowers have dropped their petals and begun to set fruit. In Tasmania, due to our damp and humid weather in spring, trees will often require follow up spraying at fortnightly intervals until the weather dries. Monitor your trees for early signs of disease and remember - it's never too late to spray - as disease will spread to new leaves as they emerge.
A close up of a plant with white flowers and green leaves.
20 February 2025
Peace Lily - a great air purifying plant
A field of red tulips with the sun shining through them
20 February 2025
How to Grow Spring Flowering Bulbs
More posts